
How do I change the language of Tom’s Planner?
Tom’s Planner is available in the languages English, French, German, Spanish and Dutch. You can change the language of the app by changing the domain of the website that you are visiting.
For English: tomsplanner.com
For French: tomsplanner.fr
For German: tomsplanner.de
For Spanish: tomsplanner.es
For Dutch: tomsplanner.nl
When changing to this new address you will have to log in again.
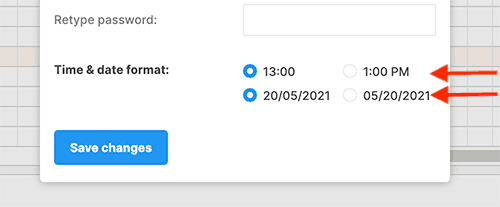
How do I change the way dates and times are displayed?
Click on the ‘my account’ link in the right top corner of the tool. At the bottom of the window that opens you can change the date and time settings.
How do I change the font size?
You can’t yet. We are sorry. We are aware that the used font size is fairly small. It has been a choice between making the schedules as compact as possible to enable the best overview of your project and usability. We do get questions on how to increase the font size on regular basis so we are aware of the problem. It’s on the To Do list to enable the setting of the font size. We found that the text is significantly better readable on Apple’s macs and laptops.
How do I transfer my account to someone else?
You can change the email address that is being used to login yourself. Just click on the ‘my account’ link in the right top corner of the tool after you have logged in and change the email address. To change the payment information please send an email to tom@tomsplanner.com. We will stop the autorenewal of the account and when the account is about to expire the new user will be promted to make a first payment and enter their payment information.
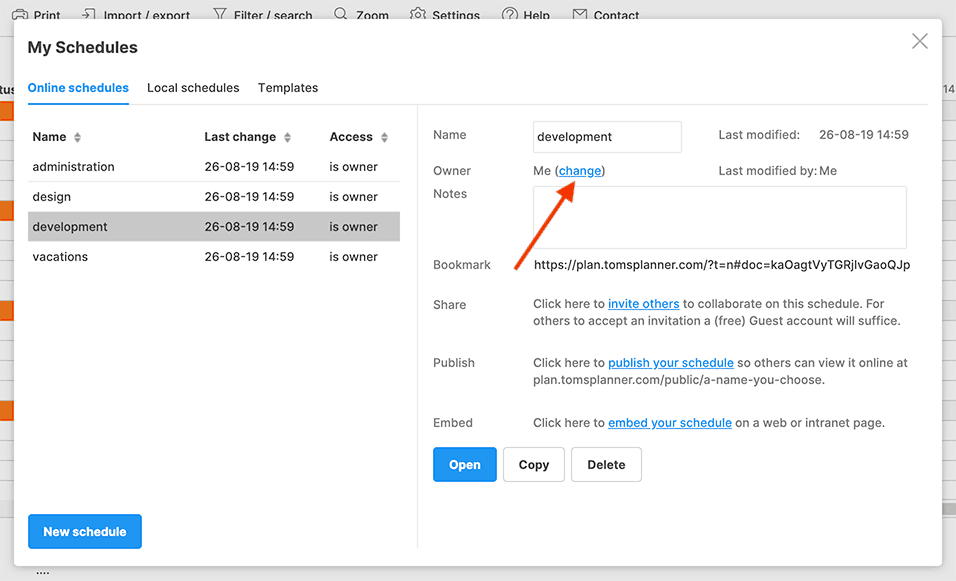
How do I transfer schedules to another account
If for instance someone else becomes the project manager of one of your projects you can transfer your schedule to the Tom’s Planner account of the new project manager. To do this just click on the ‘my schedules’ button in the toolbar and select the schedule. Then click on the change link in the owner section and follow the instructions.
Change start date schedule / move all periods & symbols at once
You can select all periods and symbols in your schedule at once and then drag and drop them with your mouse to the new date in one time. To select all periods and symbols at once please press ctrl+a on your keyboard (or cmd+a when you are working on a Mac). This will select all periods and symbols in your chart.
Copy paste between two schedules
To copy/move rows,groups, periods or symbols from one schedule (the source) to another (the destination) select the items you want to copy/move in the schedule that is the source. If you keep the shift or ctrl key pressed on your keyboard while selecting rows/groups with your mouse you can select multiple rows/groups at once. Right click the selection and choose copy from the menu. Next open the schedule you would like to paste the copied items into (the destination). The trick is to do this in the same window. So the original schedule (the source) will disappear because the new schedule (the destination schedule) will be opened. Then right click the place you would like to insert the copied elements and choose paste from the menu that appears.
Copy/duplicate a schedule
You can copy/duplicate a schedule by clicking the ‘copy’ button in the ‘my schedules’ panel:

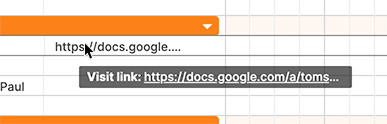
Include/upload files to schedule
You can not upload documents or files to Tom’s Planner itself but when you include links or web addresses in your texts in your schedule they will automatically become clickable. So you can upload your documents to for instance Google Docs, Dropbox or Microsoft Skydrive and add the links to the uploaded files to your schedule by including them in your texts:
Track progress %
We don’t have a specific functionality for keeping track of progress yet.For the time being you could visualize your progress by inserting a text column to indicate a percentage and using one specific symbol to indicate the progress visually:
Set start (or end) date schedule
The charts in Tom’s Planner don’t have a start or end date. You can scroll to the left or right as much as you like. So there is no way to set a start and end date for a schedule.
How ever when you print you can set a date range if you like. This way you can specify the start and end date of the part of the schedule you would like to print.
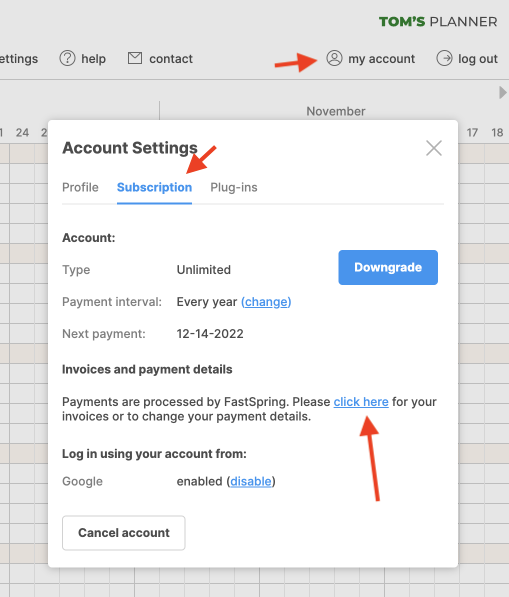
Invoices
To get the invoices of your past payments, log in at https://plan.tomsplanner.com, click on the ‘my account’ link in the right top corner of the tool, open the subscription tab, click the link as circled in the screenshot below and follow the instructions:
Installation & system requirments
Tom’s Planner is an online application and works in your browser. So there is no need to download or install anything. Just open a browser like Internet Explorer, Google Chrome, Safari or Firefox and go to www.tomsplanner.com. On the homepage click the ‘log in’ button and a new browser window will open which will load the tool automatically.
Tom’s Planner will work in almost any major modern browser with JavaScript enabled on any modern Mac, PC (Windows or Linux), iPad, iPhone or Android device.
During development Tom’s Planner is continuously being tested on: Windows 10, Ubuntu and the most recent version of Mac OS X using the browsers: Internet Explorer 11 and the latest versions of Google chrome, Safari, Edge and FireFox.
The minimum requirements in terms of processor speed and memory are hard to determine. We are pretty sure that every computer younger than 5 years will run Tom’s Planner without any problems.
Rightclick on a mac
On the Mac the mouse or trackpad doesn’t come with a distinct right-mouse button. But that doesn’t mean you can’t right-click on the Mac.
Apple uses the term ‘secondary click’ to refer to what is commonly known as the ‘right click’. Here’s how to enable and use the right/secondary-click on your Mac in four steps:
When you use a trackpad:
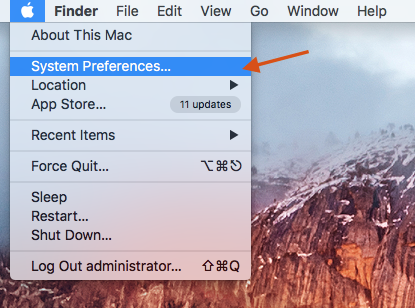
1 Open System Preferences
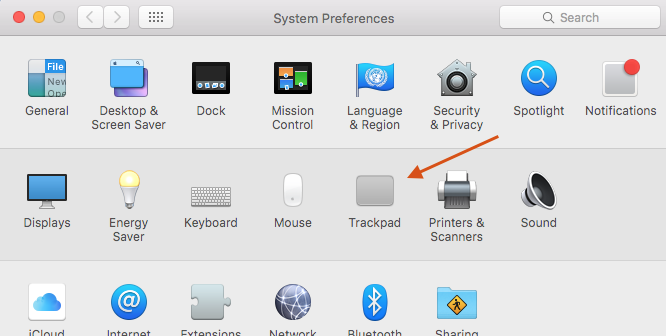
2 Click on the Trackpad icon.
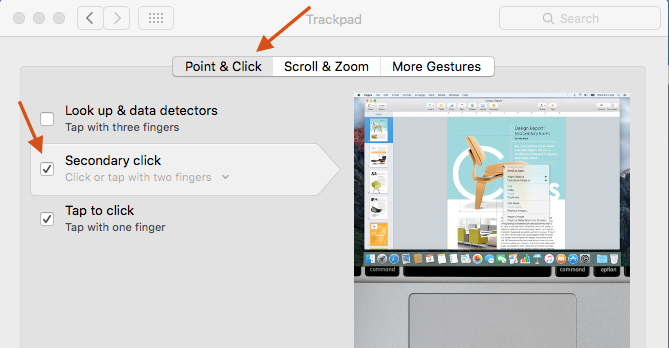
3 Make sure the Point and Click tab is selected and check the Secondary click option.
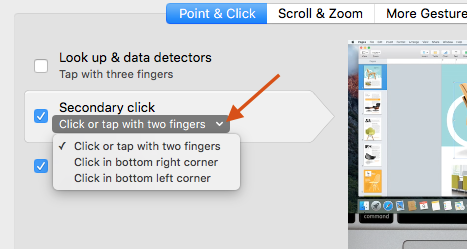
4 You can select how you want to trigger the ‘right click’. We find the ‘tap with two fingers’ option works most intuitively.
The animation on the right side of the panel shows you how to ‘right click’.
When you use a magic mouse:
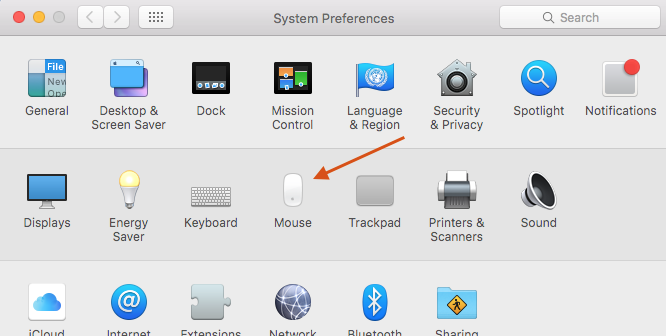
1 Open System Preferences
2 Click on the Mouse icon.
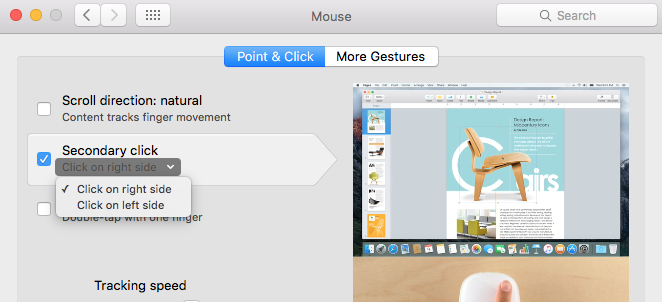
3 Make sure the Point and Click tab is selected and check the Secondary click option.
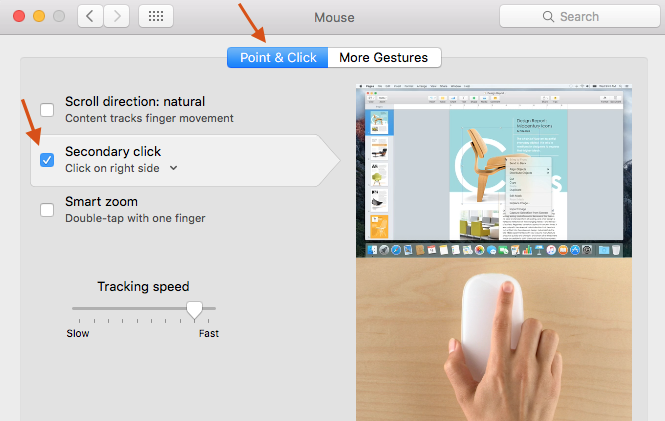
4 You can select how you want to trigger the ‘right click’. We find the ‘click on the right side’ option works most intuitively.
The animation on the right side of the panel shows you how to ‘right click’.
Need more help with this?
Don’t hesitate to contact us here.